Identify Rock Art Elements
Objective
The Identify Rock Art Elements function allows the user to identify rock art elements on the images. If there are multiple images for a panel, elements should be identified on the image showing the greatest detail for that element.
Processing
The first page displays a list of surveys that you have authority to update and have images in the identification queue.
Hyperlinks include: Area (see ShowMaps).
To continue, select a survey by clicking on the Ref Nbr of a survey.
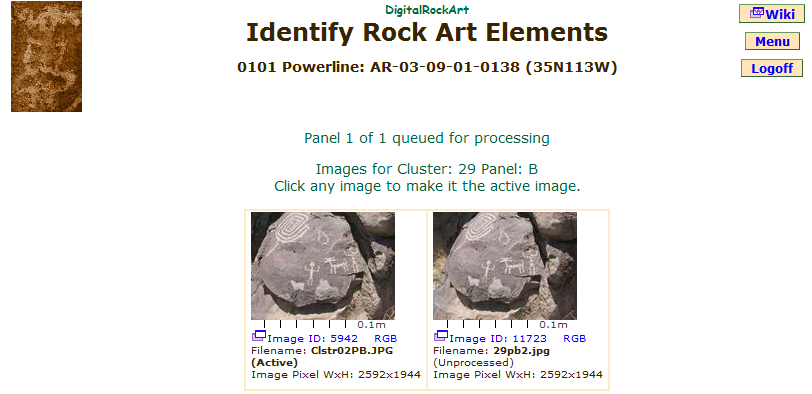
The second page will display all of the images for the current cluster/panel in a small size. One of the small images will be labeled Active, all the others will be labeled Processed or Unprocessed. By default, DigitalRockArt makes the first small image the Active image. Elements may be identified only on the Active image.
 |
If the current Active image is not the image you want to process, you may click on any of the images, Processed or Unprocessed, to make it the Active image. The page will be redisplayed with the selected image as the Active image.
Processed images may have elements previously identified. The previously identified elements will be indicated by element numbers on the element in the image.
"Do a Mouse Drag to Crop an Element"
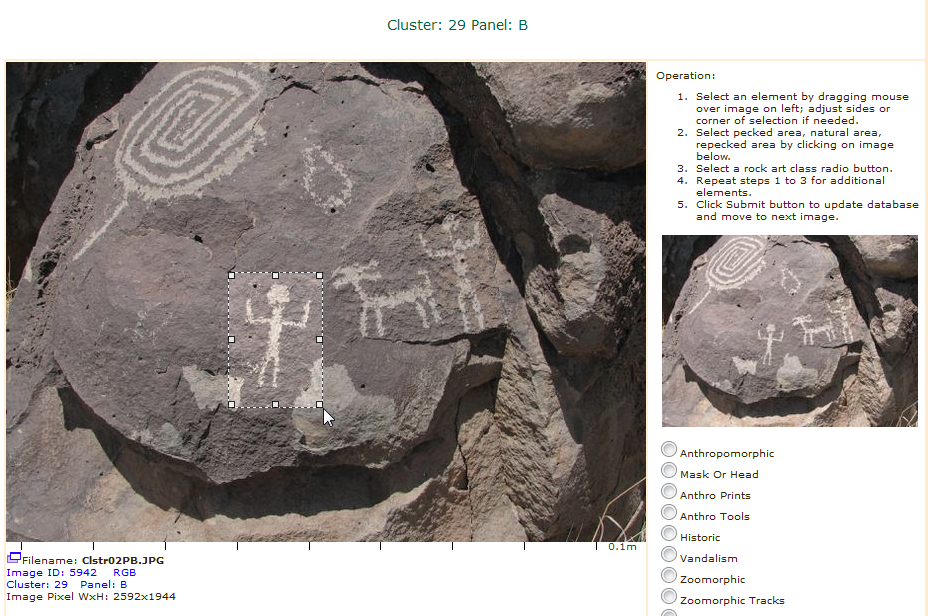
Scroll down the page to where the Active image is displayed in large size. To the right of the image are the instructions and a smaller image. Pick an element on the larger image on the left, move the mouse to any corner of the element, hold down the left mouse button, drag the mouse pointer to the opposite corner of the element and release the left mouse button. The small image on the right will change to show the selected element. If the cropping is not perfect, drag the corners or sides as needed. The small image on the right will change with each adjustment.
 |
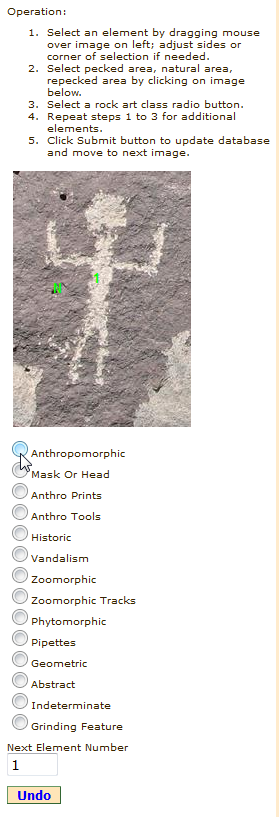
Next, look at the small image on the right. The small image may be clicked 1, 2, or 3 times. The first click should be positioned on a pecked area near the center of the image. This identifies the element number position on the panel image. If this is not done, the default element number position is the center of the selection. In most cases, it is best to select the position rather than rely on the default.
The second optional click identifies a point of natural patina on the rock. This is useful only if an analysis of the differences in the patina for the pecked and natural areas is desired. This is described in ShowElementsByPatina. If the element shows evidence of repecking, a third click is made to indicate the repecked area. In this case, the first click should always indicate the oldest pecked area and the third click the newer pecking.
Finally, review the list of rock art classes below the image and click the radio button for the selected class. When the radio button is clicked the element number will appear on the larger image and the small image will change to show the entire panel image.
 |
Repeat the above operation to identify additional elements. When you finish identifying all the elements on the image, click the Submit button at the bottom of the page. The database will be updated and the image will be labeled Processed. If all the images for the cluster/panel have been processed, the images for the next cluster/panel will display. If all the images for the cluster/panel have not been processed, the next Unprocessed image will be made the Active image.
"Next Element Number"
The application automatically increments the element number on an image. You may choose the next element number by entering the number in the Next Element Number. This may be useful if you are reworking a complex panel after deleting some elements and want to reuse the old numbers.
"Undo"
Undo will erase the last cropping of an element and the pecked, natural and repecked areas. It will also decrement the Next Element Number. This may be useful if you are not pleased with the cropping area and want to reselect new corners or change the natural, pecked and repecked areas. Undo will not work for an element once the Submit button has been clicked.
"Mark all images processed"
If all the elements on the images have been identified and there are Unprocessed images for the same cluster/panel being displayed, click the Mark all images processed check box and then the Submit button. The application will bypass processing of the Unprocessed images and display the images of the next cluster/panel.
Hyperlinks include: Rock Art Class, Image ID, RGB, Cluster, Panel (see RockArtClasses, ImageCaptions).
Buttons
Submit: updates the data base. The next page will either show the next image of the same panel as the Active image, or if there are no more Unprocessed images, the images of the next cluster/panel will be displayed.
Reset: resets to the page to the last values displayed by your browser.
Menu: takes you to the Main Menu.
 DigitalRockArt Wiki